How to convert a PNG to SVG for Cricut: 4 methods compared
How to convert a PNG to SVG for Cricut
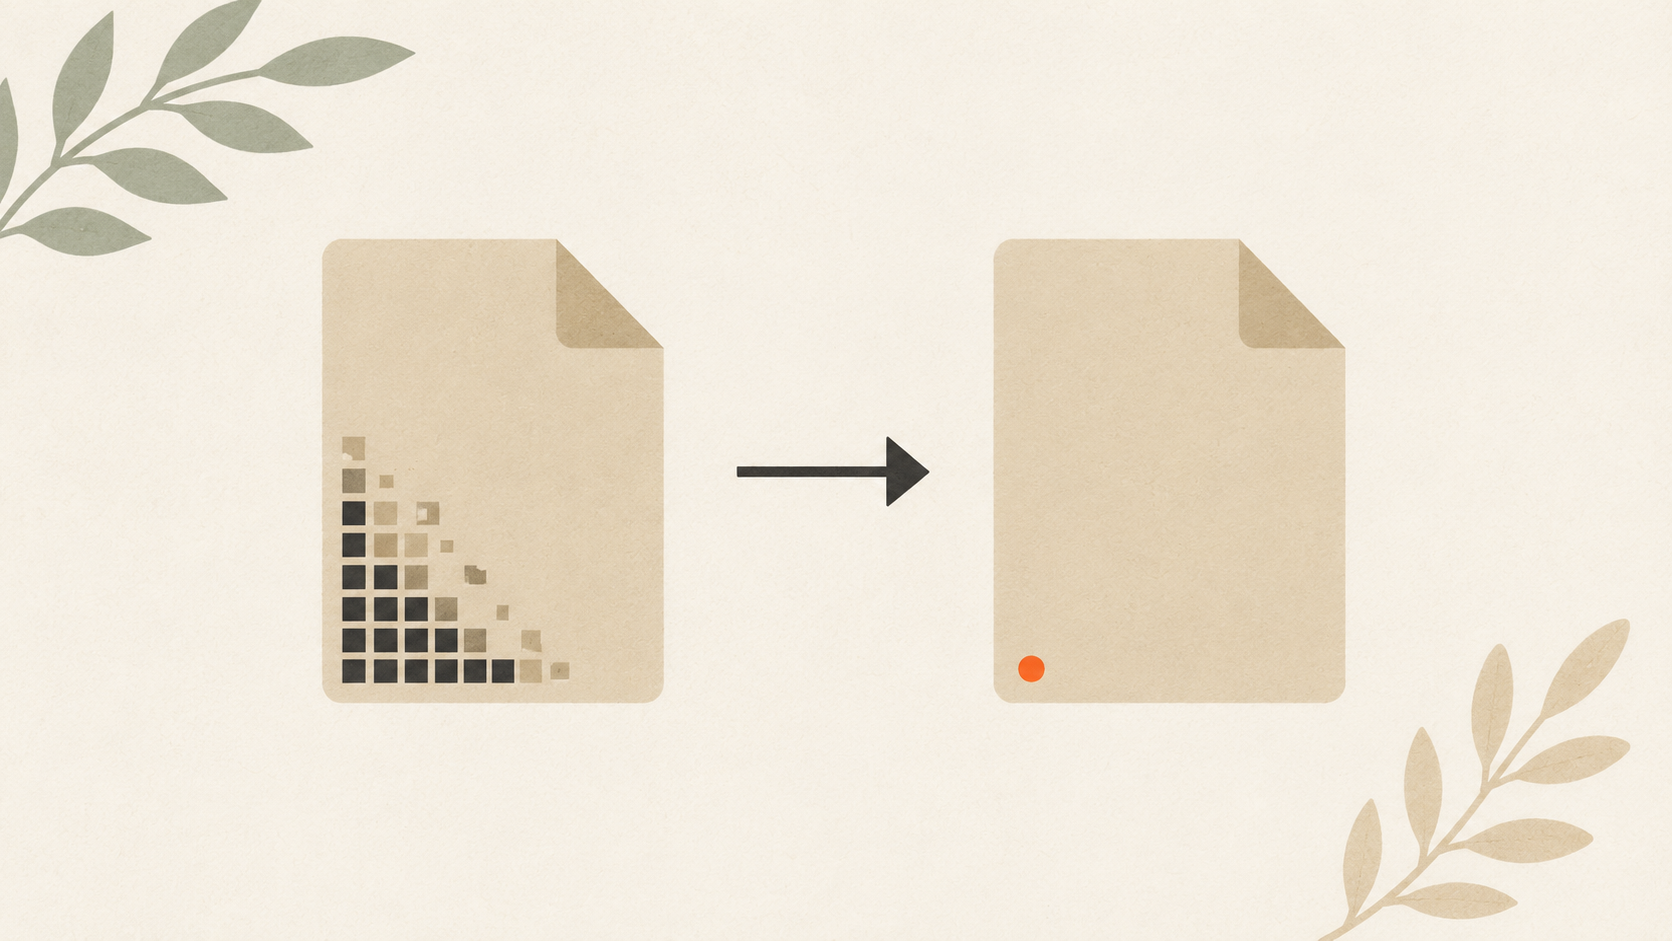
You found a design you want to cut on your Cricut. It's a PNG. Cricut Design Space accepts PNG uploads — sort of — but the results are usually wobbly, pixelated at the edges, or missing detail you wanted.
What you actually need is the SVG version of that PNG. Here's how to convert it cleanly, what tools to use, and where each one falls short.
Why this matters
Cricut machines cut along vector paths. SVG (Scalable Vector Graphics) is a vector format — it stores shapes as mathematical paths the cutter can follow precisely.
PNG (Portable Network Graphics) is a raster format. It stores the image as a grid of pixels. When you upload a PNG to Design Space, the software has to trace the pixels to invent cut paths. That trace is a best guess, and best guesses produce uneven cuts.
Cricut's SVG vs DXF guide covers the format basics. For now, the takeaway: SVG cuts cleanly, PNG doesn't.
Method 1: Cricut Design Space upload (the built-in option)
Cricut's own upload tool can convert PNG to a cut file. It's free and lives inside Design Space.
How to do it:
- Open Cricut Design Space.
- Click "Upload" in the left toolbar.
- Choose your PNG file.
- Cricut asks "Simple," "Moderately Complex," or "Complex." Pick based on your image — Simple for clean two-color designs, Complex for detailed work.
- Use the eraser and select tools to remove the background.
- Save as a "Cut Image."
What works: It's fast. No extra software needed. Free.
What doesn't: The trace quality is limited. Edges come out jagged on anything with detail. Multi-color designs lose their color information — everything becomes a single layer. Small details often disappear or merge with adjacent shapes.
For a quick, simple cut from a clean PNG, this works. For anything more demanding, you need a real vector conversion.
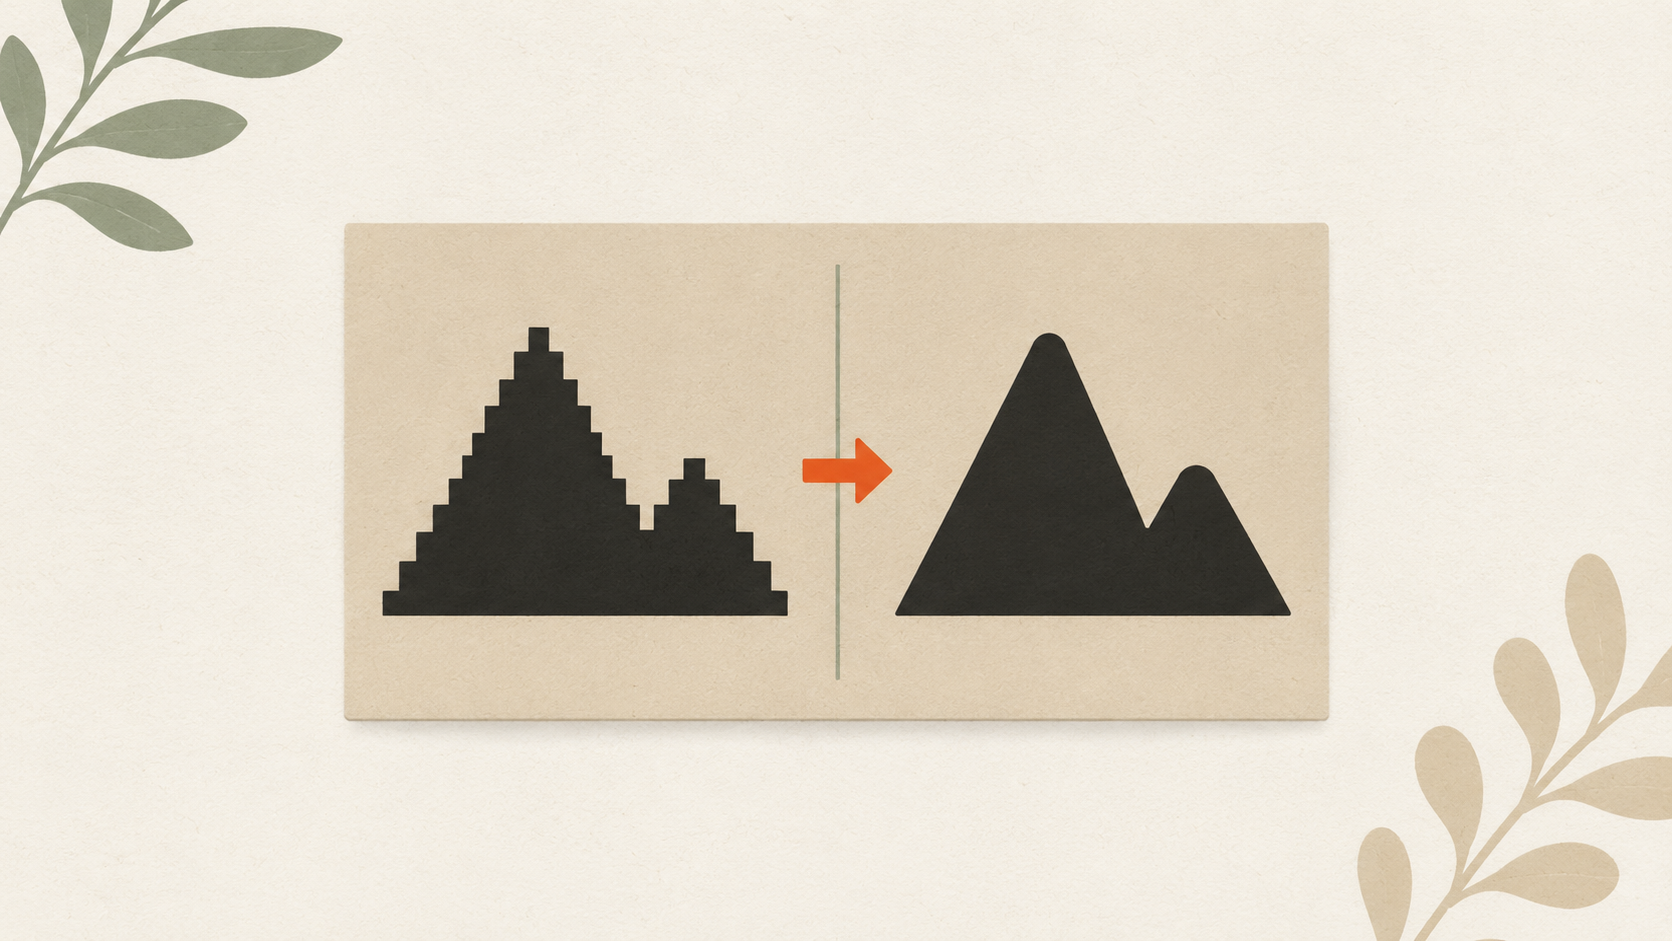
Method 2: AI vectorization (the cleanest one-step option)
AI-powered vectorization tools take a PNG and produce a true SVG with clean paths, separated colors, and editable layers. The output works directly in Design Space without further cleanup.
ArtworkUpgrade handles this conversion in a single step. Upload the PNG, see a preview before paying, then download the SVG along with PDF, EPS, AI, and DXF versions. The preview lets you check the conversion looks right before you commit.
For Cricut specifically, you want the SVG output. Save it, then import to Design Space like any other SVG file.
What works: Clean edges, separated colors, layered output. The conversion handles detail well even on smaller source files.
What doesn't: Very low-quality PNGs (under 300 pixels wide, or heavily compressed) limit how clean the conversion can be. The AI can only work with what's in the source.
Method 3: Inkscape (free, manual control)
Inkscape is free open-source vector software. It includes a "Trace Bitmap" tool that converts raster images to vector paths.
How to do it:
- Download Inkscape from inkscape.org. Install.
- Open Inkscape. File → Import → select your PNG.
- With the image selected, go to Path → Trace Bitmap.
- Choose "Single scan" for one-color designs or "Multiple scans" for multi-color.
- Adjust the threshold slider until the preview looks right. Click "Update" to refresh the preview.
- Click "Apply." The trace appears on top of your image.
- Delete the original PNG layer. Select the vector trace.
- File → Save As → choose "Plain SVG" (.svg).
What works: Free. Lots of control over the trace parameters. Handles multi-color reasonably well with multiple scans.
What doesn't: Steeper learning curve. The trace needs manual cleanup most of the time — extra nodes, smoothing, color separation tweaks. Plan for 15-30 minutes per design, not 30 seconds.
Method 4: Adobe Illustrator (paid, professional quality)
If you have Illustrator (Adobe Creative Cloud subscription), it includes Image Trace — the professional version of Inkscape's tracing tool.
How to do it:
- Open Illustrator. File → Place → select your PNG.
- Click the placed image to select it. In the top toolbar, click "Image Trace."
- Choose a preset: "Black and White Logo," "3 Colors," "6 Colors," or others depending on your design.
- Adjust the preset by clicking "Image Trace Panel" for more options.
- Click "Expand" in the top toolbar to convert the preview to editable vector paths.
- File → Save As → choose SVG. In the SVG options, set "Decimal Places" to 2 for smaller file size.
What works: Highest trace quality. Direct control over every parameter. The vector output is ready for any cutter or design tool.
What doesn't: Paid software. Subscription model. The learning curve is real if you've never used Illustrator.
Which method to choose
For most Cricut crafters, the practical hierarchy:
- High-quality result, no learning curve, paid per conversion: AI vectorization tool. Fastest path to clean output.
- Free, willing to learn, occasional use: Inkscape. Good middle ground for hobbyists.
- Free, just need a quick cut from a clean PNG: Cricut's built-in upload. Lowest quality but lowest friction.
- Already have Illustrator, professional work: Image Trace. Best results for those with the tool.
Most successful Etsy designers using Cricut started with the free options and moved to paid AI vectorization once their volume justified it.
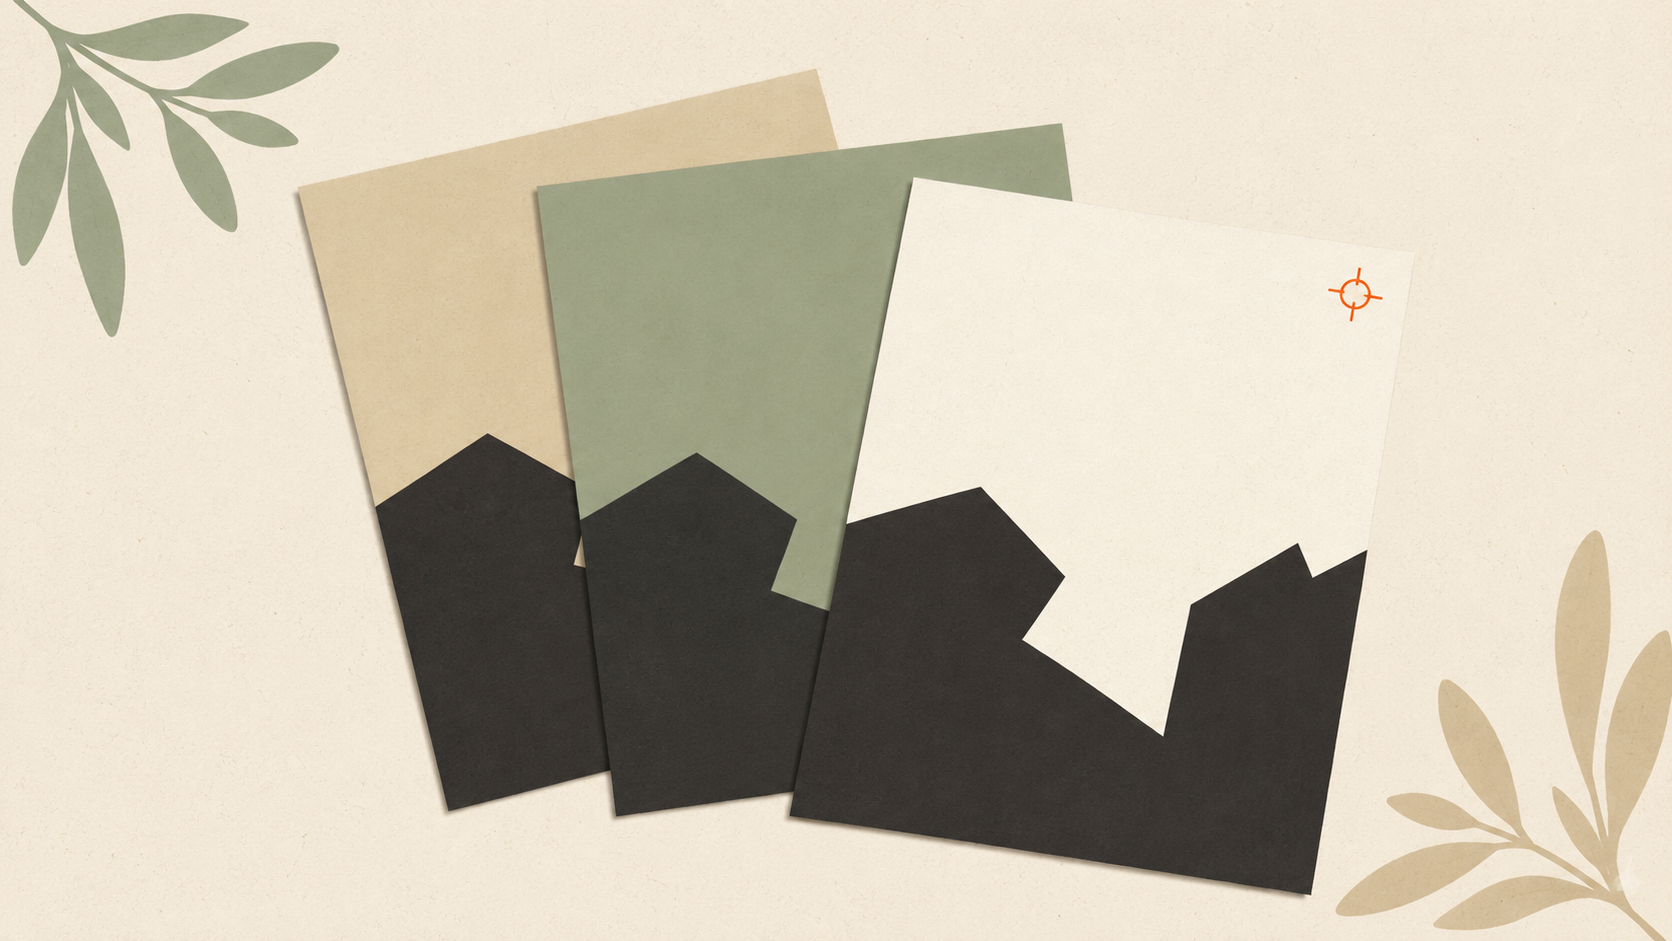
Multi-color designs need extra care
When your PNG has multiple colors that need to cut separately on different colored vinyl, the conversion gets more complex.
Cricut's built-in upload: Loses color information completely. Everything becomes one layer.
AI vectorization: Preserves color separation. The output SVG has each color as a separate layer that Design Space recognizes for multi-mat cutting.
Inkscape: Use "Multiple scans" mode and choose "Colors." This creates one path per detected color. You may need to manually separate the layers afterward.
Illustrator: Image Trace presets include "3 Colors" and "6 Colors." Choose based on your design. Use Expand and Ungroup to make each color its own editable layer.
For complex multi-color cuts, AI vectorization typically gives the cleanest separation with the least manual work.
When the source PNG is just too bad
Some PNGs can't be converted cleanly no matter what tool you use:
- Heavily compressed JPGs saved as PNG (compression artifacts visible at any zoom)
- Screenshots of logos at small size (insufficient resolution for clean trace)
- Photos converted to PNG (gradients and noise that can't simplify to vector)
- Watermarked or downsampled images (deliberately degraded sources)
For these, the options are:
- Find a better source. The original designer probably has higher-resolution files.
- Recover or remake the vector files if it's your own logo.
- Hire a designer to redraw the design from scratch in vector software.
- Accept that the cut will be approximate, not perfect.
If you've ever had a JPG you needed to convert to vector, the same logic applies — start with the best raster source available, then convert. The conversion can't add detail that wasn't there.
After conversion: cutting on your Cricut
Once you have a clean SVG:
- Open Design Space. Click "Upload."
- Choose "Upload Image" → "Browse" → select your SVG.
- Cricut imports it as a Cut layer (or layers, if multi-color).
- Verify the cut paths look right in the preview.
- Place on your mat at the size you want.
- Send to your Cricut to cut.
If your SVG was clean, the cut will be clean. If the SVG came from a poor trace, the cut shows every flaw. This is why the conversion step matters more than the cutting step.
For more on getting SVG out of design software, exporting SVG from Illustrator or Canva covers the specifics of each tool.
Common issues after import
Cuts going in unexpected places: Your SVG had hidden paths or stray points that survived conversion. Open the SVG in a vector editor and clean it up.
Multi-color SVG cuts as single layer: The color separation didn't carry through. Try a different conversion method or manually separate colors in Inkscape before saving.
Tiny details disappearing during cut: The detail was too thin for your Cricut's blade to reproduce reliably. Beef up thin lines in the SVG before cutting, or accept the simplification.
SVG file too large: The trace produced thousands of unnecessary anchor points. Use Inkscape's "Simplify" function or Illustrator's "Simplify" command to reduce node count.
File size after conversion
A clean SVG of a logo is typically 5 to 50 kilobytes. If your converted SVG is several megabytes, the trace probably embedded the source raster inside the SVG rather than producing true vector paths. Re-do the conversion with different settings, or use a different tool that produces true vector output. Large SVG files defeat the purpose of converting from PNG in the first place.
The takeaway
Converting PNG to SVG for Cricut isn't one method, it's a choice of methods. Cricut's built-in upload is fast and free but limited. AI vectorization gives the cleanest results in one step. Inkscape is the free middle ground with a learning curve. Illustrator is the pro option. Pick based on your quality requirements, budget, and how many conversions you'll do. Clean SVG in equals clean cut out — get the conversion right and the cutting takes care of itself.
Stop redrawing customer logos by hand
ArtworkUpgrade vectorizes any logo or design in 30 seconds. Free preview before you pay. $7 per design, all formats included.
Try free preview →More guides for How-To Tutorials
How to clean up a low-resolution logo: a practical workflow
Step-by-step guide to salvaging a low-resolution logo: assess the damage, reduce compression artifacts, upscale carefully, and vectorize for the permanent fix.
How to prepare your logo for an embroidery order: a checklist
What to send your embroiderer to get the best result: vector file formats, size and placement specs, color references, and how to handle it when you don't have vector files.
How to prepare a logo for screen printing: the customer guide
Step-by-step file preparation for screen printing: vector format, color separation, outlined text, Pantone references, line weights, and what to send the shop.